

Ever wondered how to interact with blockchain data without running a full node? Meet the Watchkeeper — your lightweight blockchain guardian that can verify data availability with mathematical certainty. That’s exactly what an Avail Light Client does! In this guide, we’ll walk through setting up your own light client, from basic installation to sending and receiving data. Also, check out our step-wise tutorial below:
Think of Data Availability Sampling (DAS) as your personal blockchain detective — instead of downloading the entire chain, it strategically samples random pieces of data to verify block availability with high confidence. It’s like checking if a jigsaw puzzle is complete by randomly selecting pieces — if all your random samples exist, there’s a very high probability the whole puzzle is there!
What You’ll Learn
- How to set up and run an Avail Light Client
- Methods to verify data availability without trust assumptions
- Ways to interact with Avail’s data availability layer
- Techniques for sending and reading application-specific data
Prerequisites
Your system should meet the following hardware requirements:
Minimum Requirements:
- RAM: 512MB
- CPU: 2 cores (amd64/x86 architecture)
Recommended Specifications:
- RAM: 1GB
- CPU: 4 cores (amd64/x86 architecture)
Light Client Environment Setup
Setting up an Avail Light Client is surprisingly simple. You can be up and running in just a few minutes with a single command!
Quick Installation
Prerequisites
Before we start, make sure you have curl installed on your system. Check with:
curl --versionIf curl isn't installed, here's how to get it:
# For Ubuntu/Debian
sudo apt update && sudo apt install curl

# For macOS (using Homebrew)
brew install curl
Installing the Light Client
Ready for the easiest blockchain client installation ever? Just run:
curl -sL1 avail.sh | bashThat’s it! The script will handle everything else for you. When successful, you’ll see the client output begin to stream.
You’ll get a response like:
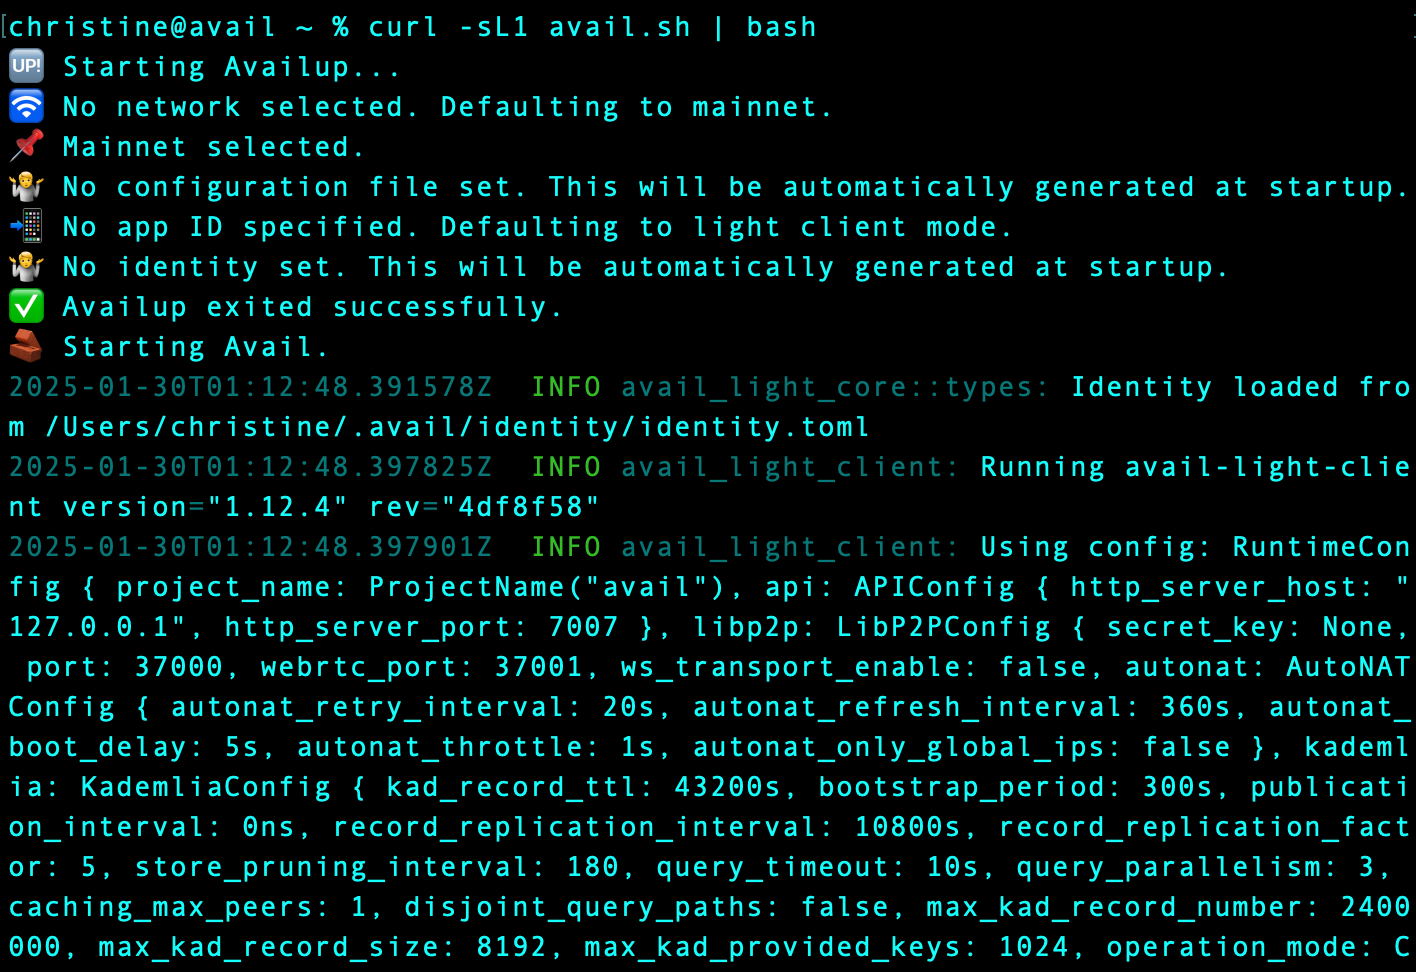
💡 Pro Tip: The command above uses availup, a convenient wrapper that handles all the complex setup for you. It's the recommended way to run an Avail light client.Interacting with Avail DA Through Your Light Client
Prerequisites
Before turning your light client into a dedicated app client, you’ll need:
- A Substrate wallet (SubWallet recommended)
- Testnet tokens from https://faucet.avail.tools
- An App ID from https://appid.availproject.org
💡 Quick Setup Links
Once you have these ready, you can configure your light client for data operations. Let’s move on to setting up your client…
Setting Up Your Light Client
1. Configure Identity
Create an identity file with your wallet’s seed phrase:
# Create and edit identity file
mkdir -p ~/.avail/identity
nano ~/.avail/identity/identity.toml
Add your seed phrase to the file:
seed_phrase = "your twelve or twenty four word seed phrase here"💡 Pro Tip: Your identity file contains sensitive information. Keep it secure and never share it!
2. Start Light Client in App Mode
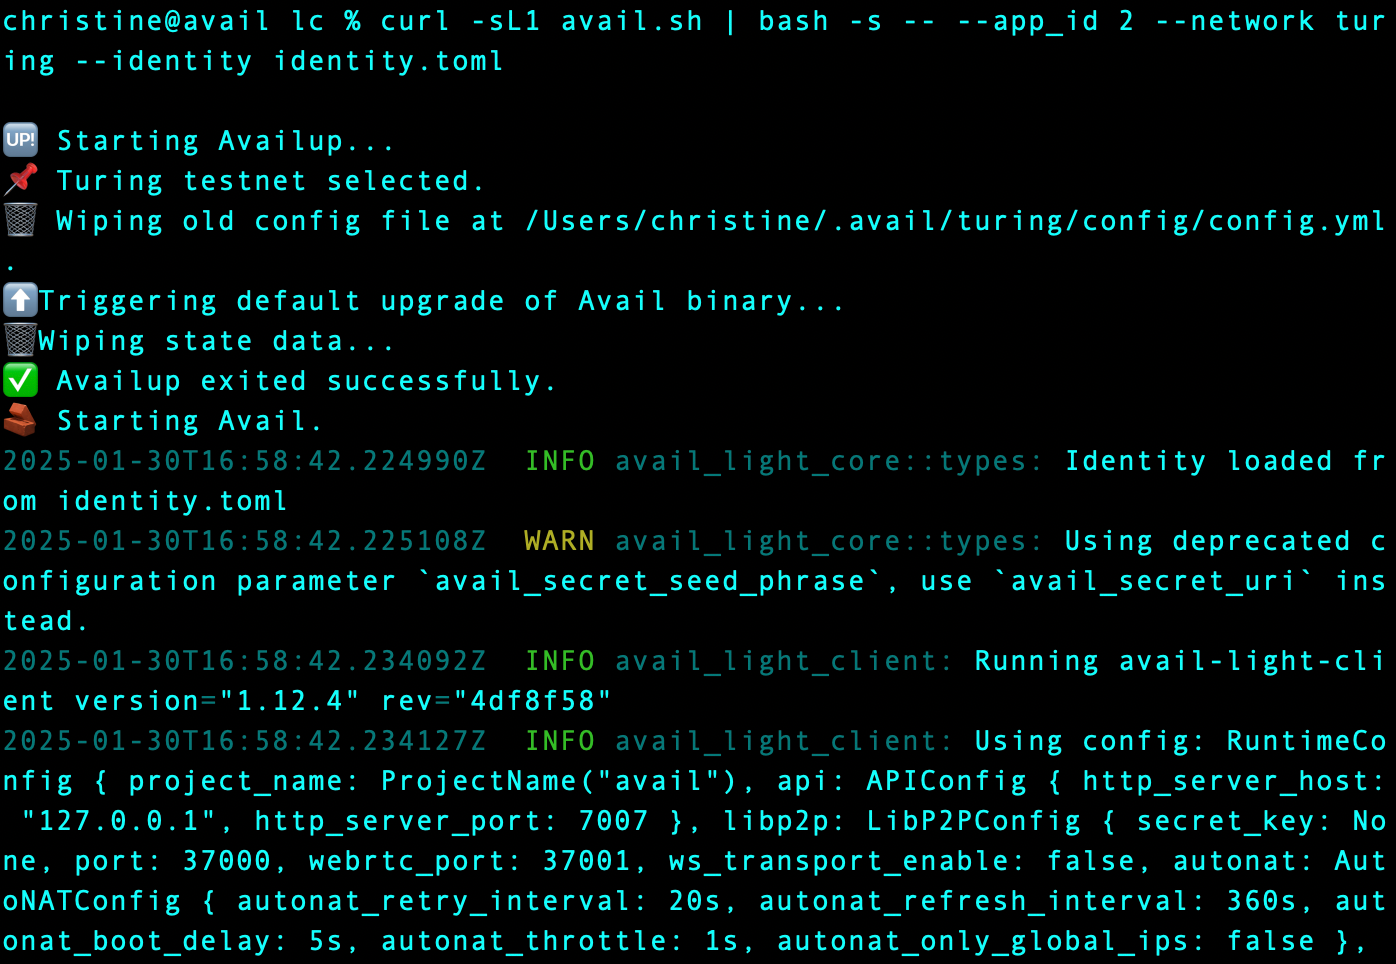
Let’s restart the light client in App Mode on the Turing test network with your new identity!
curl -sL1 avail.sh | bash -s – --app_id YOUR_APP_ID --network turing --identity ~/.avail/identity/identity.tomlYou’ll get a response like:
Reading and Writing Data with Your Light Client
Submitting Data to AvailDA
1. Prepare Your Data
Let’s submit a fun message: “Hello AvailDA! 🚀”
First, encode it to base64 in a new terminal:
# You can use the command line:
echo -n "Hello AvailDA! 🚀" | base64
# Output: SGVsbG8gQXZhaWxEQSEg8J+agA==
2. Submit the Data
Using your running light client:
Make sure it’s in app-client mode:
curl "localhost:7007/v2/status"You’ll get a response like:

Send data:
curl -X POST http://127.0.0.1:7007/v2/submit \
  --header "Content-Type: application/json" \
  --data '{"data":"SGVsbG8gQXZhaWxEQSEg8J+agA=="}'
You’ll get a response like:

💡 Pro Tip: Save the block_number - you'll need it to read your data back!Reading Your Data
To read data from a specific block:
curl "http://127.0.0.1:7007/v2/blocks/ENTER_BLOCK_NUMBER_FROM_STEP_ABOVE/data?fields=data"You’ll get a response like:

To decode the data:
echo '{"block_number":ENTER_BLOCK_NUMBER_FROM_STEP_ABOVE,"data_transactions":[{"data":"SGVsbG8gZnJvbSBBdmFpbCEg8J+agA=="}]}' | jq -r '.data_transactions[0].data' | base64 -dYou’ll get a response like:

💡 Pro Tip: When reading data, you might need to wait a few seconds after submission for the block to be processed.
Quick Test Script
You can combine all these steps into a single script. Here’s a complete example that submits data and reads it back!
Make sure you have jq installed on your system. Check with:
jq --versionIf jq isn't installed, here's how to get it:
# For Ubuntu/Debian
sudo apt update && sudo apt install jq

# For macOS (using Homebrew)
brew install jq
Create a file named submit_and_retrieve.sh:
nano submit_and_retrieve.sh
Add the following to the file:
#!/bin/bash

# Configuration
API_ENDPOINT="http://127.0.0.1:7007"
DATA="SGVsbG8gQXZhaWxEQSEg8J+agA=="  # "Hello AvailDA! 🚀" in base64

# Submit data and capture block number
echo "Submitting data..."
RESPONSE=$(curl -X POST "$API_ENDPOINT/v2/submit" \
    --header "Content-Type: application/json" \
    --data "{\"data\":\"$DATA\"}")

# Extract block number
BLOCK_NUMBER=$(echo $RESPONSE | jq -r '.block_number')
echo "Data submitted in block: $BLOCK_NUMBER"

# Wait for block processing
echo "Waiting for block processing..."
sleep 65

# Read back and display the raw data
echo "Raw Response:"
BLOCK_DATA=$(curl "$API_ENDPOINT/v2/blocks/$BLOCK_NUMBER/data?fields=data")

echo $BLOCK_DATA

# Decode and display the actual message
echo "Decoded Message:"
echo "$BLOCK_DATA" | jq -r '.data_transactions[0].data' | base64 -d
Make the script executable:
chmod +x submit_and_retrieve.shRun the script:
./submit_and_retrieve.shYou’ll get a response like:

Conclusion
Congratulations! You now have a working Avail Light Client that can:
- Verify data availability without running a full node
- Submit application-specific data to the Avail network
- Read back your data using block numbers
- Participate in the network’s data availability sampling
Check out the Light Client API docs for more ways to interact with Avail via your new light client!
💡 Final Tip: Keep your identity file and App ID secure — they’re your keys to interacting with the Avail network!
Join the Avail community to share your experience and get support!