

Learning about blockchain concepts can feel like solving a Rubik’s cube underwater! Data Availability (DA) is a crucial piece of the scaling puzzle, but it’s often mixed in with complex topics like rollups, fraud proofs, and validity proofs. Sometimes the best way to learn is to focus on one piece at a time.
In this tutorial, we're going to do just that — isolate and explore Data Availability on its own. Think of it like taking one face of that Rubik's cube and mastering it before tackling the whole puzzle. While in a production environment you'd typically interact with DA through a rollup or other scaling solution, we're going to break the rules a bit for learning purposes. We'll build a simple notes app that talks directly to Avail's DA layer!
By the end of this tutorial, you'll understand how Data Availability works by building something tangible - a decentralized notes app that stores messages directly on Avail's DA layer. It's like getting hands-on practice with one face of the Rubik's cube before diving into the deep end!

💡 Just want the code: You can skip the tutorial and run the full app here!
What We're Building
We'll create a decentralized notes application in four main steps:
- Basic Next.js Setup: A clean, responsive UI for entering and displaying notes
- Light Client Integration: Real-time status monitoring of your local Avail Light Client
- Message Functionality: Direct message submission using Avail Light Client
- Enhanced Features: Your notes on chain! Block confirmation tracking with Avail Light Client
- Track note confirmations
- Retry failed submissions
- Local backup storage
- Message history management
Prerequisites
Before starting, ensure you have:
- Node.js 18.17 or later installed
- Basic familiarity with React and Next.js
- A code editor of your choice
- An Avail Light Client running locally
💡 New to Avail?
Setting Up the Basic App
Let's build our note-taking interface step by step. The goal is to create a clean, modern UI that we'll later connect to Avail's network.
1. Create a New Next.js Project
First, let’s create a new Next.js application with Tailwind CSS:
npx create-next-app@latest avail-notes
cd avail-notes
Choose these options when prompted (just hit enter for the defaults we want):
✔ Would you like to use TypeScript? › No
✔ Would you like to use ESLint? › Yes
✔ Would you like to use Tailwind CSS? › Yes
✔ Would you like to use src/ directory? › No
✔ Would you like to use App Router? › Yes
✔ Would you like to use Turbopack for `next dev`?› No
✔ Would you like to customize the import alias? › No
2. Add Our UI Library
Install the Lucide React library for icons:
npm install lucide-react3. Set Up the Project Structure
Create a new components directory:
mkdir app/components4. Create Your First Component
Create a new file app/components/AvailNotesApp.js:
'use client';

import React, { useState } from 'react';
import { Terminal } from 'lucide-react';

const AvailNotesApp = () => {
  const [note, setNote] = useState('');

  return (
    <div className="max-w-xl mx-auto p-4">
      <div className="bg-white rounded-lg shadow-lg overflow-hidden">
        {/* Header */}
        <div className="p-4 border-b border-gray-200">
          <div className="flex items-center space-x-2">
            <Terminal className="w-6 h-6" />
            <h1 className="text-lg font-bold text-gray-900">Avail Notes</h1>
          </div>
        </div>

        {/* Content */}
        <div className="p-4">
          {/* Input area */}
          <div className="flex gap-2 mb-6">
            <input
              type="text"
              value={note}
              onChange={(e) => setNote(e.target.value)}
              placeholder="Enter your note..."
              className="flex-1 px-3 py-2 border border-gray-300 rounded-lg focus:outline-none focus:ring-2 focus:ring-blue-500"
            />
            <button
              disabled={!note}
              className="px-4 py-2 bg-blue-500 text-white rounded-lg disabled:opacity-50 disabled:cursor-not-allowed hover:bg-blue-600 transition-colors"
            >
              Send
            </button>
          </div>

          {/* Messages */}
          <div className="text-center text-gray-500 p-4">
            No notes yet. Start by sending one!
          </div>
        </div>
      </div>
    </div>
  );
};

export default AvailNotesApp;
5. Wire It Up
Replace the contents of app/page.js with:
import AvailNotesApp from './components/AvailNotesApp';

export default function Home() {
  return (
    <main className="min-h-screen bg-gray-100 py-8">
      <AvailNotesApp />
    </main>
  );
}
6. Fire It Up
Run the development server:
npm run devVisit http://localhost:3000 and you should see your shiny new notes UI!
You should see a clean UI that looks like:

Project Organization
avail-notes/
├── app/
│   ├── components/
│   │   └── AvailNotesApp.js    # Where the magic happens
│   ├── layout.js               # Tailwind setup
│   └── page.js                 # App wrapper
├── package.json
└── tailwind.config.jsPart 2: Adding Light Client Connectivity
Before we start coding, let's understand what we're connecting to:
- Avail Light Client runs locally on port 7007
- Provides REST API endpoints (we'll use
/v2/status) - Operates in either "Light Client Mode" or "App Client Mode"
1. Set Up State Management
First, let's add the state we need to track the client's status:
const [status, setStatus] = useState('disconnected');
const [clientInfo, setClientInfo] = useState({
  mode: '',
  appId: null,
  blockHeight: 0
});
const [error, setError] = useState(null);
2. Create Status Checker
Next, let's create a function to fetch status from the Light Client:
const fetchStatus = async () => {
  try {
    const response = await fetch('http://localhost:7007/v2/status');
    if (!response.ok) {
      throw new Error('Light Client returned error status');
    }

    const data = await response.json();
    const clientMode = data.modes.includes('app')
      ? 'App Client Mode'
      : 'Light Client Mode';

    setClientInfo({
      mode: clientMode,
      appId: data.app_id,
      blockHeight: data.blocks.latest
    });
    setStatus('connected');
    setError(null);
  } catch (error) {
    console.error('Error fetching status:', error);
    setStatus('error');
    setError(error.message);
  }
};
3. Add Status Polling
We want to continuously check the client's status:
useEffect(() => {
  fetchStatus(); // Initial fetch
  const interval = setInterval(fetchStatus, 2000);
  return () => clearInterval(interval);
}, []);
4. Show Connection Status
Finally, let's add the status information to our UI:
{/* Status Cards */}
<div className="bg-gray-50 rounded-lg p-4 space-y-3">
  {/* Connection Status */}
  <div className="flex items-center justify-between">
    <span className="text-gray-600">Status</span>
    <span className="flex items-center text-green-500">
      {status === 'connected' && <RefreshCcw className="w-4 h-4 mr-1 animate-spin" />}
      {status === 'connected' ? 'Active' : status}
    </span>
  </div>

  {/* Client Mode */}
  <div className="flex items-center justify-between">
    <span className="text-gray-600">Client Mode</span>
    <span className="text-blue-500">{clientInfo.mode || 'Unknown'}</span>
  </div>

  {/* App ID (if available) */}
  {clientInfo.appId && (
    <div className="flex items-center justify-between">
      <span className="text-gray-600">App ID</span>
      <span className="text-orange-500">#{clientInfo.appId}</span>
    </div>
  )}

  {/* Block Height */}
  <div className="flex items-center justify-between">
    <span className="text-gray-600">Block Height</span>
    <span className="text-purple-500">#{clientInfo.blockHeight}</span>
  </div>

  {/* Error Display */}
  {error && (
    <div className="flex items-center gap-2 text-red-500 text-sm">
      <AlertCircle className="w-4 h-4" />
      {error}
    </div>
  )}
</div>
5. Try it out!
Start your Light Client:
curl -sL1 avail.sh | bash -s – --app_id YOUR_APP_ID --network turing --identity ~/.avail/identity/identity.tomlStart your app:
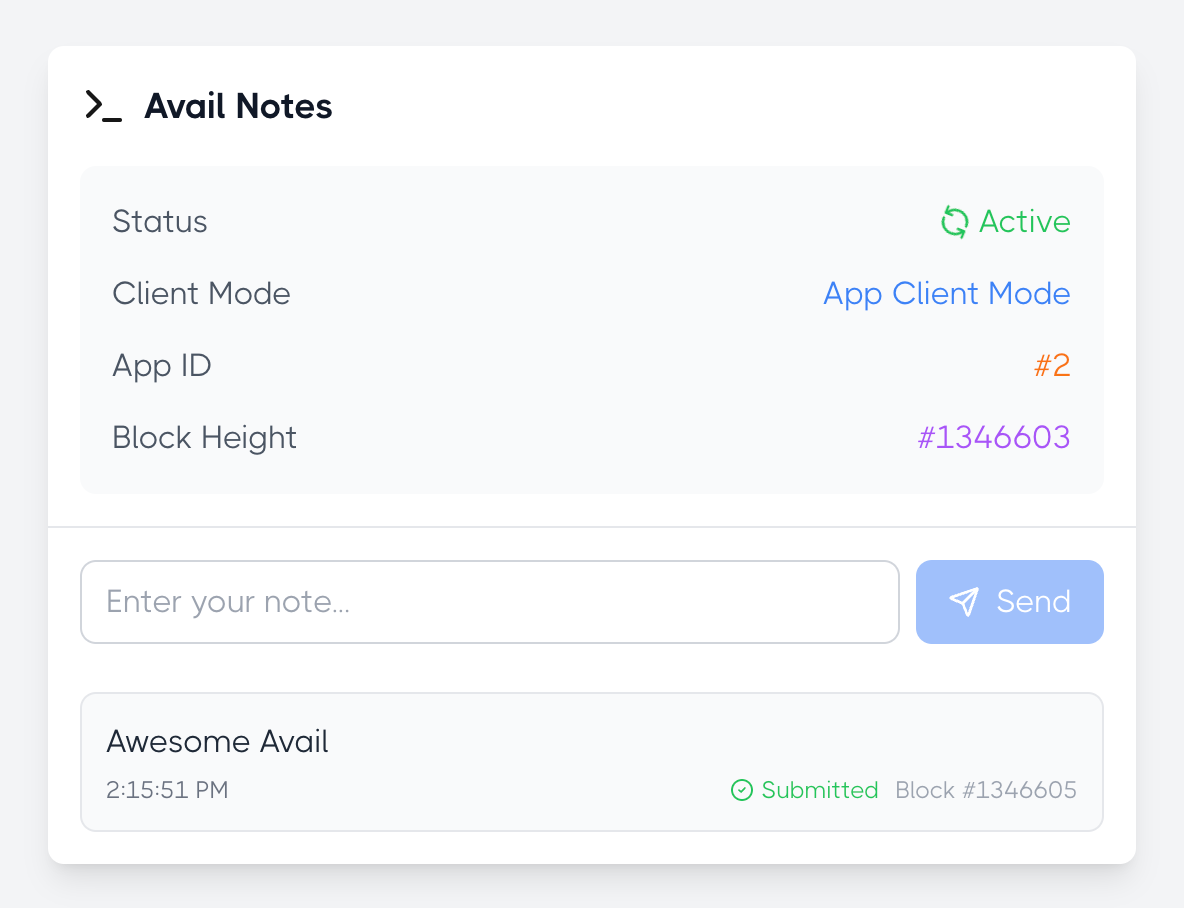
npm run devVisit http://localhost:3000 and you should see your connection status!
Your UI will now look like:

💡 Want the full code for part 2?
'use client';

import React, { useState, useEffect } from 'react';
import { Terminal, RefreshCcw } from 'lucide-react';

const AvailNotesApp = () => {
  const [note, setNote] = useState('');
  const [status, setStatus] = useState('disconnected');
  const [clientInfo, setClientInfo] = useState({
    mode: '',
    appId: null,
    blockHeight: 0
  });

  // Fetch status from Light Client
  const fetchStatus = async () => {
    try {
      const response = await fetch('http://localhost:7007/v2/status');
      const data = await response.json();

      const clientMode = data.modes.includes('app') ? 'App Client Mode' : 'Light Client Mode';
      setClientInfo({
        mode: clientMode,
        appId: data.app_id,
        blockHeight: data.blocks.latest
      });
      setStatus('connected');
    } catch (error) {
      console.error('Error fetching status:', error);
      setStatus('error');
    }
  };

  // Poll for status updates
  useEffect(() => {
    fetchStatus(); // Initial fetch
    const interval = setInterval(fetchStatus, 2000);
    return () => clearInterval(interval);
  }, []);

  return (
    <div className="max-w-xl mx-auto p-4">
      <div className="bg-white rounded-lg shadow-lg overflow-hidden">
        {/* Header */}
        <div className="p-4 border-b border-gray-200">
          <div className="flex items-center justify-between mb-4">
            <div className="flex items-center space-x-2">
              <Terminal className="w-6 h-6" />
              <h1 className="text-lg font-bold text-gray-900">Avail Notes</h1>
            </div>
          </div>

          {/* Status Cards */}
          <div className="bg-gray-50 rounded-lg p-4 space-y-3">
            <div className="flex items-center justify-between">
              <span className="text-gray-600">Status</span>
              <span className="flex items-center text-green-500">
                {status === 'connected' && <RefreshCcw className="w-4 h-4 mr-1 animate-spin" />}
                {status === 'connected' ? 'Active' : status}
              </span>
            </div>

            <div className="flex items-center justify-between">
              <span className="text-gray-600">Client Mode</span>
              <span className="text-blue-500">{clientInfo.mode || 'Unknown'}</span>
            </div>

            {clientInfo.appId && (
              <div className="flex items-center justify-between">
                <span className="text-gray-600">App ID</span>
                <span className="text-orange-500">#{clientInfo.appId}</span>
              </div>
            )}

            <div className="flex items-center justify-between">
              <span className="text-gray-600">Block Height</span>
              <span className="text-purple-500">#{clientInfo.blockHeight}</span>
            </div>
          </div>
        </div>

        {/* Content */}
        <div className="p-4">
          {/* Input area */}
          <div className="flex gap-2 mb-6">
            <input
              type="text"
              value={note}
              onChange={(e) => setNote(e.target.value)}
              placeholder="Enter your note..."
              className="flex-1 px-3 py-2 border border-gray-300 rounded-lg focus:outline-none focus:ring-2 focus:ring-blue-500"
            />
            <button
              disabled={!note || status !== 'connected'}
              className="px-4 py-2 bg-blue-500 text-white rounded-lg disabled:opacity-50 disabled:cursor-not-allowed hover:bg-blue-600 transition-colors"
            >
              Send
            </button>
          </div>

          <div className="text-center text-gray-500 p-4">
            No notes yet. Start by sending one!
          </div>
        </div>
      </div>
    </div>
  );
};

export default AvailNotesApp;
Part 3: Adding Message Functionality
Now let's make our app talk to AvailDA! We'll build this in 5 clear steps:
1. Set Up Message State
First, let's add state for managing our messages:
import { Terminal, RefreshCcw, Send, Clock, CheckCircle2 } from 'lucide-react';

const [messages, setMessages] = useState([]);
const [note, setNote] = useState('');
2. Add Status Display Helper
Let's define a helper function to manage message status displays:
const getStatusDisplay = (messageStatus) => {
  switch (messageStatus) {
    case 'pending':
      return {
        color: 'text-yellow-500',
        icon: <Clock className="w-3 h-3" />,
        text: 'Pending'
      };
    case 'submitted':
      return {
        color: 'text-green-500',
        icon: <CheckCircle2 className="w-3 h-3" />,
        text: 'Submitted'
      };
    case 'failed':
      return {
        color: 'text-red-500',
        icon: null,
        text: 'Failed'
      };
    default:
      return {
        color: 'text-gray-500',
        icon: null,
        text: messageStatus
      };
  }
};
3. Message Submission Function
Here's the core function for submitting notes to the Light Client:
const submitNote = async () => {
  if (!note) return;

  // Create pending message
  const pendingMessage = {
    id: Date.now(),
    data: note,
    timestamp: new Date().toLocaleTimeString(),
    status: 'pending',
  };

  // Add to messages and clear input
  setMessages(prev => [pendingMessage, ...prev]);
  setNote('');

  try {
    // Submit to Light Client
    const response = await fetch('http://localhost:7007/v2/submit', {
      method: 'POST',
      headers: {
        'Content-Type': 'application/json',
      },
      body: JSON.stringify({
        data: btoa(note)  // Base64 encode the note
      })
    });

    if (!response.ok) {
      throw new Error('Failed to submit note');
    }

    const result = await response.json();

    // Update message status on success
    setMessages(prev => prev.map(msg =>
      msg.id === pendingMessage.id
        ? {
            ...msg,
            status: 'submitted',
            blockNumber: result.block_number
          }
        : msg
    ));
  } catch (error) {
    console.error('Error submitting note:', error);
    // Update message status on failure
    setMessages(prev => prev.map(msg =>
      msg.id === pendingMessage.id
        ? {
            ...msg,
            status: 'failed'
          }
        : msg
    ));
  }
};
4. Add Message Input UI
The input area for new messages:
{/* Input area */}
<div className="flex gap-2 mb-6">
  <input
    type="text"
    value={note}
    onChange={(e) => setNote(e.target.value)}
    onKeyPress={(e) => e.key === 'Enter' && submitNote()}
    placeholder="Enter your note..."
    className="flex-1 px-3 py-2 border border-gray-300 rounded-lg focus:outline-none focus:ring-2 focus:ring-blue-500"
  />
  <button
    onClick={submitNote}
    disabled={!note || status !== 'connected'}
    className="px-4 py-2 bg-blue-500 text-white rounded-lg flex items-center gap-2 disabled:opacity-50 disabled:cursor-not-allowed hover:bg-blue-600 transition-colors"
  >
    <Send className="w-4 h-4" />
    Send
  </button>
</div>
5. Add Message Display UI
The component to display all messages:
{/* Messages */}
<div className="space-y-3">
  {messages.map((msg) => {
    const statusDisplay = getStatusDisplay(msg.status);
    return (
      <div
        key={msg.id}
        className="p-3 bg-gray-50 rounded-lg border border-gray-200"
      >
        <p className="text-gray-800">{msg.data}</p>
        <div className="flex justify-between items-center mt-1">
          <p className="text-xs text-gray-500">{msg.timestamp}</p>
          <div className="flex items-center gap-2">
            <span className={`text-xs flex items-center gap-1 ${statusDisplay.color}`}>
              {statusDisplay.icon}
              {statusDisplay.text}
            </span>
            {msg.blockNumber && (
              <span className="text-xs text-gray-400">Block #{msg.blockNumber}</span>
            )}
          </div>
        </div>
      </div>
    );
  })}
  {messages.length === 0 && (
    <div className="text-center text-gray-500 p-4">
      No notes yet. Start by sending one!
    </div>
  )}
</div>
6. Try It Out!
Start your Light Client:
curl -sL1 avail.sh | bash -s – --app_id YOUR_APP_ID --network turing --identity ~/.avail/identity/identity.tomlStart your app:
npm run devVisit http://localhost:3000 and send your first on-chain note!
Your UI will now look like:
💡 Want the full code for part 3?
'use client';

import React, { useState, useEffect } from 'react';
import { Terminal, RefreshCcw, Send, Clock, CheckCircle2 } from 'lucide-react';

const AvailNotesApp = () => {
  const [note, setNote] = useState('');
  const [status, setStatus] = useState('disconnected');
  const [messages, setMessages] = useState([]);
  const [clientInfo, setClientInfo] = useState({
    mode: '',
    appId: null,
    blockHeight: 0
  });

  const fetchStatus = async () => {
    try {
      const response = await fetch('http://localhost:7007/v2/status');
      const data = await response.json();

      const clientMode = data.modes.includes('app') ? 'App Client Mode' : 'Light Client Mode';
      setClientInfo({
        mode: clientMode,
        appId: data.app_id,
        blockHeight: data.blocks.latest
      });
      setStatus('connected');
    } catch (error) {
      console.error('Error fetching status:', error);
      setStatus('error');
    }
  };

  useEffect(() => {
    fetchStatus();
    const interval = setInterval(fetchStatus, 2000);
    return () => clearInterval(interval);
  }, []);

  // Submit note
  const submitNote = async () => {
    if (!note) return;

    // Add pending message immediately
    const pendingMessage = {
      id: Date.now(),
      data: note,
      timestamp: new Date().toLocaleTimeString(),
      status: 'pending',
    };

    setMessages(prev => [pendingMessage, ...prev]);
    setNote(''); // Clear input immediately

    try {
      const response = await fetch('http://localhost:7007/v2/submit', {
        method: 'POST',
        headers: {
          'Content-Type': 'application/json',
        },
        body: JSON.stringify({
          data: btoa(note)
        })
      });

      if (!response.ok) {
        throw new Error('Failed to submit note');
      }

      const result = await response.json();

      // Update the message with submission details
      setMessages(prev => prev.map(msg =>
        msg.id === pendingMessage.id
          ? {
              ...msg,
              status: 'submitted',
              blockNumber: result.block_number
            }
          : msg
      ));
    } catch (error) {
      console.error('Error submitting note:', error);
      setMessages(prev => prev.map(msg =>
        msg.id === pendingMessage.id
          ? {
              ...msg,
              status: 'failed'
            }
          : msg
      ));
    }
  };

  // Get status display info
  const getStatusDisplay = (messageStatus) => {
    switch (messageStatus) {
      case 'pending':
        return {
          color: 'text-yellow-500',
          icon: <Clock className="w-3 h-3" />,
          text: 'Pending'
        };
      case 'submitted':
        return {
          color: 'text-green-500',
          icon: <CheckCircle2 className="w-3 h-3" />,
          text: 'Submitted'
        };
      case 'failed':
        return {
          color: 'text-red-500',
          icon: null,
          text: 'Failed'
        };
      default:
        return {
          color: 'text-gray-500',
          icon: null,
          text: messageStatus
        };
    }
  };

  return (
    <div className="max-w-xl mx-auto p-4">
      <div className="bg-white rounded-lg shadow-lg overflow-hidden">
        {/* Header */}
        <div className="p-4 border-b border-gray-200">
          <div className="flex items-center justify-between mb-4">
            <div className="flex items-center space-x-2">
              <Terminal className="w-6 h-6" />
              <h1 className="text-lg font-bold text-gray-900">Avail Notes</h1>
            </div>
          </div>

          {/* Status Cards */}
          <div className="bg-gray-50 rounded-lg p-4 space-y-3">
            <div className="flex items-center justify-between">
              <span className="text-gray-600">Status</span>
              <span className="flex items-center text-green-500">
                {status === 'connected' && <RefreshCcw className="w-4 h-4 mr-1 animate-spin" />}
                {status === 'connected' ? 'Active' : status}
              </span>
            </div>

            <div className="flex items-center justify-between">
              <span className="text-gray-600">Client Mode</span>
              <span className="text-blue-500">{clientInfo.mode || 'Unknown'}</span>
            </div>

            {clientInfo.appId && (
              <div className="flex items-center justify-between">
                <span className="text-gray-600">App ID</span>
                <span className="text-orange-500">#{clientInfo.appId}</span>
              </div>
            )}

            <div className="flex items-center justify-between">
              <span className="text-gray-600">Block Height</span>
              <span className="text-purple-500">#{clientInfo.blockHeight}</span>
            </div>
          </div>
        </div>

        {/* Content */}
        <div className="p-4">
          {/* Input area */}
          <div className="flex gap-2 mb-6">
            <input
              type="text"
              value={note}
              onChange={(e) => setNote(e.target.value)}
              onKeyPress={(e) => e.key === 'Enter' && submitNote()}
              placeholder="Enter your note..."
              className="flex-1 px-3 py-2 border border-gray-300 rounded-lg focus:outline-none focus:ring-2 focus:ring-blue-500"
            />
            <button
              onClick={submitNote}
              disabled={!note || status !== 'connected'}
              className="px-4 py-2 bg-blue-500 text-white rounded-lg flex items-center gap-2 disabled:opacity-50 disabled:cursor-not-allowed hover:bg-blue-600 transition-colors"
            >
              <Send className="w-4 h-4" />
              Send
            </button>
          </div>

          {/* Messages */}
          <div className="space-y-3">
            {messages.map((msg) => {
              const statusDisplay = getStatusDisplay(msg.status);
              return (
                <div
                  key={msg.id}
                  className="p-3 bg-gray-50 rounded-lg border border-gray-200"
                >
                  <p className="text-gray-800">{msg.data}</p>
                  <div className="flex justify-between items-center mt-1">
                    <p className="text-xs text-gray-500">{msg.timestamp}</p>
                    <div className="flex items-center gap-2">
                      <span className={`text-xs flex items-center gap-1 ${statusDisplay.color}`}>
                        {statusDisplay.icon}
                        {statusDisplay.text}
                      </span>
                      {msg.blockNumber && (
                        <span className="text-xs text-gray-400">Block #{msg.blockNumber}</span>
                      )}
                    </div>
                  </div>
                </div>
              );
            })}
            {messages.length === 0 && (
              <div className="text-center text-gray-500 p-4">
                No notes yet. Start by sending one!
              </div>
            )}
          </div>
        </div>
      </div>
    </div>
  );
};

export default AvailNotesApp;
Part 4: Enhanced Message Functionality with Block Data
Let's supercharge our app with some advanced features! We'll add block data tracking, local storage, and message management.
Add Smart Block Data Fetching
First, let's add our resilient block data fetching function:
const fetchBlockData = async (blockNumber, attempt = 0) => {
  try {
    const response = await fetch(
      `http://localhost:7007/v2/blocks/${blockNumber}/data?fields=data,extrinsic`
    );

    if (!response.ok) {
      // If we get a 404, the block might not be synced yet
      if (response.status === 404) {
        if (attempt < 5) {
          const delay = 2000 * Math.pow(2, attempt);
          await new Promise(resolve => setTimeout(resolve, delay));
          return fetchBlockData(blockNumber, attempt + 1);
        }
        return null;
      }
      throw new Error('Failed to fetch block data');
    }

    const blockData = await response.json();
    return blockData;
  } catch (error) {
    console.error(`Error fetching block ${blockNumber}:`, error);
    if (attempt < 5) {
      const delay = 2000 * Math.pow(2, attempt);
      await new Promise(resolve => setTimeout(resolve, delay));
      return fetchBlockData(blockNumber, attempt + 1);
    }
    return null;
  }
};
2. Save Notes Locally
Set up storage for messages with a dedicated key:
const STORAGE_KEY = 'avail-notes-blocks';

// Load messages on initial render
useEffect(() => {
  const savedMessages = localStorage.getItem(STORAGE_KEY);
  if (savedMessages) {
    try {
      setMessages(JSON.parse(savedMessages));
    } catch (e) {
      console.error('Error loading saved messages:', e);
    }
  }
}, []);

// Save messages when they change
useEffect(() => {
  localStorage.setItem(STORAGE_KEY, JSON.stringify(messages));
}, [messages]);
3. Track Block Confirmations
Add automatic block data loading for messages:
useEffect(() => {
  const loadBlockData = async () => {
    const updatedMessages = await Promise.all(
      messages.map(async (msg) => {
        if (msg.status === 'submitted' && msg.blockNumber && !msg.blockData) {
          const blockData = await fetchBlockData(msg.blockNumber);
          return {
            ...msg,
            blockData
          };
        }
        return msg;
      })
    );

    if (JSON.stringify(messages) !== JSON.stringify(updatedMessages)) {
      setMessages(updatedMessages);
    }
  };

  loadBlockData();
}, [messages]);
4. Add Message Management
Add functions to handle message operations:
const clearHistory = () => {
  if (window.confirm('Are you sure you want to clear all message history?')) {
    setMessages([]);
    localStorage.removeItem(STORAGE_KEY);
  }
};

const deleteMessage = (id) => {
  setMessages(prev => prev.filter(msg => msg.id !== id));
};
5. Enhanced UI
Add the clear history button to the header:
<div className="flex items-center justify-between mb-4">
  <div className="flex items-center space-x-2">
    <Terminal className="w-6 h-6" />
    <h1 className="text-lg font-bold text-gray-900">Avail Notes</h1>
  </div>
  {messages.length > 0 && (
    <button
      onClick={clearHistory}
      className="text-sm text-red-500 hover:text-red-600"
    >
      Clear History
    </button>
  )}
</div>
Update the message component to include delete functionality and block data:
<div
  key={msg.id}
  className="p-3 bg-gray-50 rounded-lg border border-gray-200 relative group"
>
  <button
    onClick={() => deleteMessage(msg.id)}
    className="absolute top-2 right-2 text-gray-400 hover:text-red-500 opacity-0 group-hover:opacity-100 transition-opacity"
  >
    <Trash2 className="w-4 h-4" />
  </button>
  <p className="text-gray-800 pr-8">{msg.data}</p>
  <div className="flex justify-between items-center mt-1">
    <p className="text-xs text-gray-500">{msg.timestamp}</p>
    <div className="flex items-center gap-2">
      <span className={`text-xs flex items-center gap-1 ${statusDisplay.color}`}>
        {statusDisplay.icon}
        {statusDisplay.text}
        {msg.retries > 0 && ` (${msg.retries} ${msg.retries === 1 ? 'retry' : 'retries'})`}
      </span>
      {msg.blockNumber && (
        <span className="text-xs text-gray-400 hover:text-blue-500 cursor-pointer">
          Block #{msg.blockNumber}
          {msg.blockData && (
            <span className="ml-1 text-xs text-green-500">✓</span>
          )}
        </span>
      )}
    </div>
  </div>
  {msg.blockData && (
    <div className="mt-2 text-xs bg-gray-100 p-2 rounded">
      <p className="font-medium text-gray-700">Block Data:</p>
      <pre className="overflow-x-auto text-gray-600">
        {JSON.stringify(msg.blockData, null, 2)}
      </pre>
    </div>
  )}
</div>
6. Try it out!
Start your Light Client:
curl -sL1 avail.sh | bash -s – --app_id YOUR_APP_ID --network turing --identity ~/.avail/identity/identity.tomlStart your app:
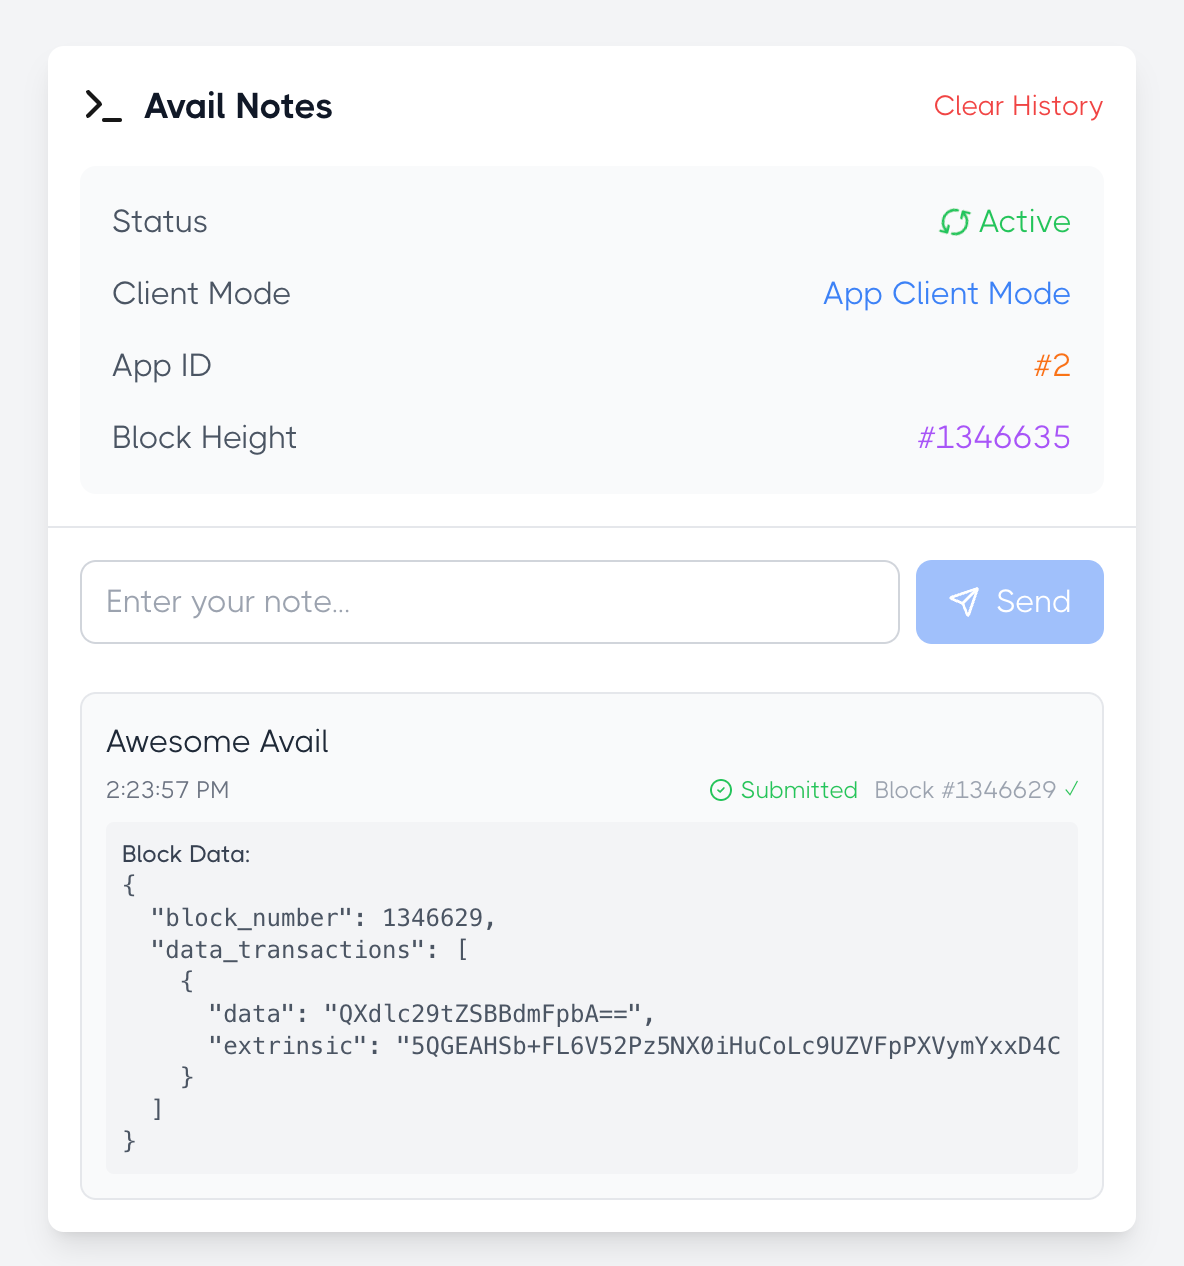
npm run devVisit http://localhost:3000 and try:
- Sending messages
- Watching block confirmations
- Deleting messages
- Clearing history
- Refreshing the page (your notes persist!)
Your UI will now look like:
💡 Want the full code for part 4?
'use client';

import React, { useState, useEffect } from 'react';
import { Terminal, RefreshCcw, Send, Clock, CheckCircle2, Trash2, AlertCircle } from 'lucide-react';

const STORAGE_KEY = 'avail-notes-blocks';

const AvailNotesApp = () => {
  const [note, setNote] = useState('');
  const [status, setStatus] = useState('disconnected');
  const [messages, setMessages] = useState([]);
  const [clientInfo, setClientInfo] = useState({
    mode: '',
    appId: null,
    blockHeight: 0
  });
  const [error, setError] = useState(null);

  const fetchBlockData = async (blockNumber, attempt = 0) => {
    try {
      const response = await fetch(
        `http://localhost:7007/v2/blocks/${blockNumber}/data?fields=data,extrinsic`
      );

      if (!response.ok) {
        // If we get a 404, the block might not be synced yet
        if (response.status === 404) {
          if (attempt < 5) { // Try up to 5 times
            // Exponential backoff: 2s, 4s, 8s, 16s, 32s
            const delay = 2000 * Math.pow(2, attempt);
            await new Promise(resolve => setTimeout(resolve, delay));
            return fetchBlockData(blockNumber, attempt + 1);
          }
          // After max retries, return null but don't treat as error
          return null;
        }
        // For other errors, throw
        throw new Error('Failed to fetch block data');
      }

      const blockData = await response.json();
      return blockData;
    } catch (error) {
      console.error(`Error fetching block ${blockNumber}:`, error);
      if (attempt < 5) {
        // Retry on network errors too
        const delay = 2000 * Math.pow(2, attempt);
        await new Promise(resolve => setTimeout(resolve, delay));
        return fetchBlockData(blockNumber, attempt + 1);
      }
      return null;
    }
  };

  // Load messages from localStorage on initial render
  useEffect(() => {
    const savedMessages = localStorage.getItem(STORAGE_KEY);
    if (savedMessages) {
      try {
        setMessages(JSON.parse(savedMessages));
      } catch (e) {
        console.error('Error loading saved messages:', e);
      }
    }
  }, []);

  // Save messages to localStorage whenever they change
  useEffect(() => {
    localStorage.setItem(STORAGE_KEY, JSON.stringify(messages));
  }, [messages]);

  // Load block data for messages
  useEffect(() => {
    const loadBlockData = async () => {
      const updatedMessages = await Promise.all(
        messages.map(async (msg) => {
          if (msg.status === 'submitted' && msg.blockNumber && !msg.blockData) {
            const blockData = await fetchBlockData(msg.blockNumber);
            return {
              ...msg,
              blockData
            };
          }
          return msg;
        })
      );

      if (JSON.stringify(messages) !== JSON.stringify(updatedMessages)) {
        setMessages(updatedMessages);
      }
    };

    loadBlockData();
  }, [messages]);

  const fetchStatus = async () => {
    try {
      const response = await fetch('http://localhost:7007/v2/status');
      if (!response.ok) {
        throw new Error('Light Client returned error status');
      }
      const data = await response.json();

      const clientMode = data.modes.includes('app') ? 'App Client Mode' : 'Light Client Mode';
      setClientInfo({
        mode: clientMode,
        appId: data.app_id,
        blockHeight: data.blocks.latest
      });
      setStatus('connected');
      setError(null);
    } catch (error) {
      console.error('Error fetching status:', error);
      setStatus('error');
      setError(error.message);
    }
  };

  useEffect(() => {
    fetchStatus();
    const interval = setInterval(fetchStatus, 2000);
    return () => clearInterval(interval);
  }, []);

  const submitNote = async () => {
    if (!note) return;

    const pendingMessage = {
      id: Date.now(),
      data: note,
      timestamp: new Date().toLocaleTimeString(),
      status: 'pending',
      retries: 0,
      blockNumber: null,
      blockData: null
    };

    setMessages(prev => [pendingMessage, ...prev]);
    setNote('');

    const submitWithRetry = async (message, attempt = 0) => {
      try {
        const response = await fetch('http://localhost:7007/v2/submit', {
          method: 'POST',
          headers: {
            'Content-Type': 'application/json',
          },
          body: JSON.stringify({
            data: btoa(message.data)
          })
        });

        if (!response.ok) {
          throw new Error('Failed to submit note');
        }

        const result = await response.json();

        setMessages(prev => prev.map(msg =>
          msg.id === message.id
            ? {
                ...msg,
                status: 'submitted',
                blockNumber: result.block_number,
                retries: attempt
              }
            : msg
        ));
      } catch (error) {
        console.error('Error submitting note:', error);

        if (attempt < 2) { // Retry up to 2 times
          setTimeout(() => {
            submitWithRetry(message, attempt + 1);
          }, 1000 * (attempt + 1)); // Exponential backoff

          setMessages(prev => prev.map(msg =>
            msg.id === message.id
              ? {
                  ...msg,
                  status: 'retrying',
                  retries: attempt + 1
                }
              : msg
          ));
        } else {
          setMessages(prev => prev.map(msg =>
            msg.id === message.id
              ? {
                  ...msg,
                  status: 'failed',
                  error: error.message,
                  retries: attempt
                }
              : msg
          ));
        }
      }
    };

    submitWithRetry(pendingMessage);
  };

  const clearHistory = () => {
    if (window.confirm('Are you sure you want to clear all message history?')) {
      setMessages([]);
      localStorage.removeItem(STORAGE_KEY);
    }
  };

  const deleteMessage = (id) => {
    setMessages(prev => prev.filter(msg => msg.id !== id));
  };

  const getStatusDisplay = (messageStatus) => {
    switch (messageStatus) {
      case 'pending':
        return {
          color: 'text-yellow-500',
          icon: <Clock className="w-3 h-3" />,
          text: 'Pending'
        };
      case 'retrying':
        return {
          color: 'text-orange-500',
          icon: <RefreshCcw className="w-3 h-3 animate-spin" />,
          text: 'Retrying'
        };
      case 'submitted':
        return {
          color: 'text-green-500',
          icon: <CheckCircle2 className="w-3 h-3" />,
          text: 'Submitted'
        };
      case 'failed':
        return {
          color: 'text-red-500',
          icon: <AlertCircle className="w-3 h-3" />,
          text: 'Failed'
        };
      default:
        return {
          color: 'text-gray-500',
          icon: null,
          text: messageStatus
        };
    }
  };

  return (
    <div className="max-w-xl mx-auto p-4">
      <div className="bg-white rounded-lg shadow-lg overflow-hidden">
        {/* Header */}
        <div className="p-4 border-b border-gray-200">
          <div className="flex items-center justify-between mb-4">
            <div className="flex items-center space-x-2">
              <Terminal className="w-6 h-6" />
              <h1 className="text-lg font-bold text-gray-900">Avail Notes</h1>
            </div>
            {messages.length > 0 && (
              <button
                onClick={clearHistory}
                className="text-sm text-red-500 hover:text-red-600"
              >
                Clear History
              </button>
            )}
          </div>

          {/* Status Cards */}
          <div className="bg-gray-50 rounded-lg p-4 space-y-3">
            <div className="flex items-center justify-between">
              <span className="text-gray-600">Status</span>
              <span className="flex items-center text-green-500">
                {status === 'connected' && <RefreshCcw className="w-4 h-4 mr-1 animate-spin" />}
                {status === 'connected' ? 'Active' : status}
              </span>
            </div>

            <div className="flex items-center justify-between">
              <span className="text-gray-600">Client Mode</span>
              <span className="text-blue-500">{clientInfo.mode || 'Unknown'}</span>
            </div>

            {clientInfo.appId && (
              <div className="flex items-center justify-between">
                <span className="text-gray-600">App ID</span>
                <span className="text-orange-500">#{clientInfo.appId}</span>
              </div>
            )}

            <div className="flex items-center justify-between">
              <span className="text-gray-600">Block Height</span>
              <span className="text-purple-500">#{clientInfo.blockHeight}</span>
            </div>

            {error && (
              <div className="flex items-center gap-2 text-red-500 text-sm">
                <AlertCircle className="w-4 h-4" />
                {error}
              </div>
            )}
          </div>
        </div>

        {/* Content */}
        <div className="p-4">
          {/* Input area */}
          <div className="flex gap-2 mb-6">
            <input
              type="text"
              value={note}
              onChange={(e) => setNote(e.target.value)}
              onKeyPress={(e) => e.key === 'Enter' && submitNote()}
              placeholder="Enter your note..."
              className="flex-1 px-3 py-2 border border-gray-300 rounded-lg focus:outline-none focus:ring-2 focus:ring-blue-500"
            />
            <button
              onClick={submitNote}
              disabled={!note || status !== 'connected'}
              className="px-4 py-2 bg-blue-500 text-white rounded-lg flex items-center gap-2 disabled:opacity-50 disabled:cursor-not-allowed hover:bg-blue-600 transition-colors"
            >
              <Send className="w-4 h-4" />
              Send
            </button>
          </div>

          {/* Messages */}
          <div className="space-y-3">
            {messages.map((msg) => {
              const statusDisplay = getStatusDisplay(msg.status);
              return (
                <div
                  key={msg.id}
                  className="p-3 bg-gray-50 rounded-lg border border-gray-200 relative group"
                >
                  <button
                    onClick={() => deleteMessage(msg.id)}
                    className="absolute top-2 right-2 text-gray-400 hover:text-red-500 opacity-0 group-hover:opacity-100 transition-opacity"
                  >
                    <Trash2 className="w-4 h-4" />
                  </button>
                  <p className="text-gray-800 pr-8">{msg.data}</p>
                  <div className="flex justify-between items-center mt-1">
                    <p className="text-xs text-gray-500">{msg.timestamp}</p>
                    <div className="flex items-center gap-2">
                      <span className={`text-xs flex items-center gap-1 ${statusDisplay.color}`}>
                        {statusDisplay.icon}
                        {statusDisplay.text}
                        {msg.retries > 0 && ` (${msg.retries} ${msg.retries === 1 ? 'retry' : 'retries'})`}
                      </span>
                      {msg.blockNumber && (
                        <span className="text-xs text-gray-400 hover:text-blue-500 cursor-pointer">
                          Block #{msg.blockNumber}
                          {msg.blockData && (
                            <span className="ml-1 text-xs text-green-500">✓</span>
                          )}
                        </span>
                      )}
                    </div>
                  </div>
                  {msg.blockData && (
                    <div className="mt-2 text-xs bg-gray-100 p-2 rounded">
                      <p className="font-medium text-gray-700">Block Data:</p>
                      <pre className="overflow-x-auto text-gray-600">
                        {JSON.stringify(msg.blockData, null, 2)}
                      </pre>
                    </div>
                  )}
                  {msg.error && (
                    <p className="text-xs text-red-500 mt-1">{msg.error}</p>
                  )}
                </div>
              );
            })}
            {messages.length === 0 && (
              <div className="text-center text-gray-500 p-4">
                No notes yet. Start by sending one!
              </div>
            )}
          </div>
        </div>
      </div>
    </div>
  );
};

export default AvailNotesApp;
Mission Accomplished!
Congratulations - you've built a fully functional decentralized notes app! You've taken your first steps into the world of Data Availability by creating an app that:
- ✍️ Writes notes directly to Avail's DA layer
- 🔍 Tracks your data through the blockchain
- ✅ Verifies your notes are securely stored
Every note you write is now stored in a decentralized, verifiable way. Pretty cool for your first blockchain app!
💡 Pro Tip: While we talked directly to Avail's DA layer for learning, production apps typically use rollups or scaling solutions. Consider this your foundation for building bigger things!
Check out the Light Client API docs for more ways to interact with Avail via your new light client!
What's Next?
- 📚 Dive deeper into the Light Client API docs
- 🔒 Keep your identity file and App ID secure (they're your 🔑 to Avail!)
- 🛠️ Start building your own DA-powered applications
Come share what you've built and get support: