
Navigating Web3 networks today can feel like asking users to become blockchain experts just to use an app! They need to manage gas on different chains, bridge assets manually and constantly switch networks. What if your users could interact with multiple blockchain networks from within your app instead?
The Avail Nexus SDK makes this a reality. Think of it like the internet, you don't think about which servers host websites, you just browse different websites and pages seamlessly. The Nexus SDK does the same for blockchains, handling all the complex multi-chain operations behind the scenes.
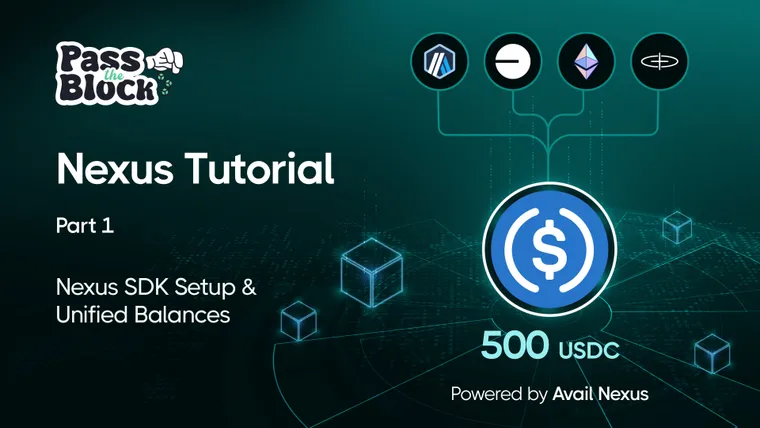
In Part 1, we're going to setup the foundation, a clean Web3 application that displays unified token balances across multiple chains. This might seem simple, but it's an important foundation for your users to see all their assets in one place, regardless of which blockchain they're on.
Tutorial Series Overview
This is Part 1 of 4 in our comprehensive Nexus SDK tutorials:
✅ Part 1: Getting Started (You are here)
- Set up the Nexus SDK from scratch
- Build unified balance display
- Handle wallet connections and basic errors
🔜 Part 2: Cross-Chain Operations (Coming next)
- Implement cross-chain bridging
- Move assets between networks seamlessly
- Handle token transfer confirmations and status
🔜 Part 3: Direct Transfers (Coming soon)
- Send tokens directly across chains
- Build cross-chain payment flows
- Advanced transaction handling
🔜 Part 4: Production Ready (Final part)
- Deploy to mainnet with confidence
- Advanced error monitoring and analytics
- Performance optimization and scaling
💡 Just want the code?
You can skip the tutorial and run the complete Part 1 application here!
What We're Building in Part 1
We'll create a Unified Balance View that showcases the core power of Avail Nexus.
What You'll Learn:
- How to set up the Nexus SDK from scratch
- Building unified balance displays across multiple chains
- Implementing wallet connection flows
- Handling basic error scenarios gracefully
What You'll Build:
- A clean, responsive Web3 application
- Real-time unified balance tracking across chains
- Professional wallet connection interface
- Solid foundation for Parts 2-4
Prerequisites
Before we begin, ensure you have:
- Node.js (v16 or higher) - Download here
- A package manager (npm, yarn, or pnpm)
- Basic knowledge of React/Next.js - hooks, components, state management
- A wallet extension like MetaMask installed and set up
- Some testnet tokens for testing (we'll show you how to get them)
Important Considerations
Before we dive into the code, there are a few key things to understand about the Nexus SDK.
Browser-Only Environment
The Nexus SDK is designed specifically for browser environments and cannot be used in server-side contexts.
This means:
- All SDK operations must happen on the client side
- Use
'use client'directive in Next.js App Router - No SDK calls in API routes or server components
Wallet Provider Requirement
The SDK requires an injected wallet provider to function:
- MetaMask, WalletConnect, or similar wallet extensions
- The wallet must be unlocked and connected
- Users need to approve the initial connection
Initialization is Critical
The SDK must be properly initialized before any other methods are called:
- Wait for wallet connection before initializing
- Handle initialization errors gracefully
- Provide clear feedback during setup
Step 1: Create a New Project
Let's start with a fresh Next.js project that we'll enhance throughout this tutorial series.
npx create-next-app@latest nexus-sdk-tutorial
cd nexus-sdk-tutorial
When prompted, select these options for the best development experience:
✔ Would you like to use TypeScript? › Yes
✔ Would you like to use ESLint? › Yes
✔ Would you like to use Tailwind CSS? › Yes (optional, for styling)
✔ Would you like to use `src/` directory? › No
✔ Would you like to use App Router? › Yes
✔ Would you like to customize the default import alias? › No
Why these choices?
- TypeScript: Provides better development experience and catches errors early
- ESLint: Helps maintain code quality and consistency
- Tailwind CSS: Makes styling fast and consistent (optional but recommended)
- App Router: The modern Next.js routing system with better performance
Step 2: Install Dependencies
Install the Nexus SDK and required wallet connection libraries:
npm install @avail-project/nexus connectkit wagmi viem @tanstack/react-query lucide-reactIf you encounter dependency conflicts with React 19:
npm install @avail-project/nexus connectkit wagmi viem @tanstack/react-query lucide-react --legacy-peer-depsUnderstanding the Dependencies
@avail-project/nexus: The core Nexus SDK for chain abstractionconnectkit: Beautiful, user-friendly wallet connection UIwagmi: React hooks for Ethereum, provides wallet connection logicviem: TypeScript interface for Ethereum, modern alternative to ethers.js@tanstack/react-query: State management library required by wagmi for caching and data fetching
Step 3: Set Up ConnectKit Provider
ConnectKit provides a seamless wallet connection experience that works great with the Nexus SDK.
Create components/Web3Provider.tsx:
'use client';

import { WagmiProvider, createConfig, http } from 'wagmi';
import { sepolia, baseSepolia, polygonAmoy, arbitrumSepolia, optimismSepolia } from 'wagmi/chains';
import { ConnectKitProvider, getDefaultConfig } from 'connectkit';
import { QueryClient, QueryClientProvider } from '@tanstack/react-query';
import { ReactNode, useState } from 'react';

// Configure wagmi with ConnectKit - testnets only for development
const config = createConfig(
  getDefaultConfig({
    // Your dApp info
    appName: 'Nexus SDK Tutorial - Part 1',
    appDescription: 'Learning chain abstraction with unified balance viewing',
    appUrl: 'https://localhost:3000',
    appIcon: '/avail-logo.svg', // Add Avail logo to your public folder

    // WalletConnect Project ID (get from https://cloud.walletconnect.com)
    walletConnectProjectId: process.env.NEXT_PUBLIC_WALLETCONNECT_PROJECT_ID || 'your-wallet-connect-project-id',

    // Supported chains - testnets only for safe development
    chains: [
      sepolia,        // Ethereum testnet
      baseSepolia,    // Base testnet
      polygonAmoy,    // Polygon testnet
      arbitrumSepolia, // Arbitrum testnet
      optimismSepolia  // Optimism testnet
    ],
    transports: {
      [sepolia.id]: http(),
      [baseSepolia.id]: http(),
      [polygonAmoy.id]: http(),
      [arbitrumSepolia.id]: http(),
      [optimismSepolia.id]: http(),
    },
  })
);

interface Web3ProviderProps {
  children: ReactNode;
}

export function Web3Provider({ children }: Web3ProviderProps) {
  // Create a client for TanStack Query (required by wagmi)
  const [queryClient] = useState(() => new QueryClient({
    defaultOptions: {
      queries: {
        staleTime: 1000 * 60 * 5, // 5 minutes
        retry: false,
      },
    },
  }));

  return (
    <QueryClientProvider client={queryClient}>
      <WagmiProvider config={config}>
        <ConnectKitProvider
          theme="auto"
          mode="light"
          customTheme={{
            "--ck-border-radius": "8px",
            "--ck-primary-button-background": "#2563eb",
            "--ck-primary-button-hover-background": "#1d4ed8",
          }}
          options={{
            enforceSupportedChains: false,
            walletConnectName: "Nexus Tutorial",
          }}
        >
          {children}
        </ConnectKitProvider>
      </WagmiProvider>
    </QueryClientProvider>
  );
}
Configuration Explained
WalletConnect Project ID: Get this free from WalletConnect Cloud. It's required for mobile wallet connections.
Supported Tetnet Chains: The tutorial supports these testnet networks:
- Sepolia (11155111) - Ethereum testnet
- Base Sepolia (84532) - Base testnet
- Polygon Amoy (80002) - Polygon testnet
- Arbitrum Sepolia (421614) - Arbitrum testnet
- Optimism Sepolia (11155420) - Optimism testnet
Transport Configuration: Uses default RPC endpoints. In Part 4, we'll upgrade to dedicated RPC providers for production.
Step 4: Create Nexus Provider
This is where the magic happens! We'll create a provider that initializes and manages the Nexus SDK.
Create components/NexusProvider.tsx:
'use client';

import { createContext, useContext, useEffect, useState, ReactNode } from 'react';
import { useAccount } from 'wagmi';

// Global window extension for wallet provider
declare global {
  interface Window {
    ethereum?: any;
  }
}

interface NexusContextType {
  sdk: any; // Replace with actual SDK type when available
  isInitialized: boolean;
  balances: any[];
  isLoading: boolean;
  error: string | null;
  refreshBalances: () => Promise<void>;
}

const NexusContext = createContext<NexusContextType | undefined>(undefined);

interface NexusProviderProps {
  children: ReactNode;
}

export function NexusProvider({ children }: NexusProviderProps) {
  const { isConnected, address } = useAccount();
  const [sdk, setSdk] = useState<any>(null);
  const [isInitialized, setIsInitialized] = useState(false);
  const [balances, setBalances] = useState<any[]>([]);
  const [isLoading, setIsLoading] = useState(false);
  const [error, setError] = useState<string | null>(null);

  // Initialize SDK when wallet connects
  useEffect(() => {
    if (isConnected && window.ethereum && !isInitialized && !isLoading) {
      initializeSDK();
    }
  }, [isConnected, isInitialized, isLoading]);

  // Fetch balances after SDK is initialized
  useEffect(() => {
    if (isInitialized && sdk) {
      fetchBalances(sdk);
    }
  }, [isInitialized, sdk]);

  const initializeSDK = async () => {
    try {
      setIsLoading(true);
      setError(null);

      // Dynamic import to ensure client-side only loading
      const { NexusSDK } = await import('@avail-project/nexus');
      const nexusSDK = new NexusSDK({ network: 'testnet' });

      // Initialize with the wallet provider
      await nexusSDK.initialize(window.ethereum);

      // Set up allowance hook for token approvals
      nexusSDK.setOnAllowanceHook(async ({ allow, sources }: { allow: (allowances: string[]) => void; sources: any[] }) => {
        console.log('Allowance required for sources:', sources);

        // For Part 1, we'll auto-approve with minimum allowances
        // In Part 2, we'll build proper approval modals
        const allowances = sources.map(() => 'min');
        allow(allowances);
      });

      // Set up intent hook for transaction previews
      nexusSDK.setOnIntentHook(({ intent, allow }: { intent: any; allow: () => void }) => {
        console.log('Transaction intent:', intent);

        // For Part 1, we'll auto-approve
        // In Part 3, we'll build transaction preview modals
        allow();
      });

      setSdk(nexusSDK);
      setIsInitialized(true);

      // Fetch initial balances
      await fetchBalances(nexusSDK);

    } catch (error) {
      console.error('Failed to initialize Nexus SDK:', error);
      setError(error instanceof Error ? error.message : 'Failed to initialize SDK');
    } finally {
      setIsLoading(false);
    }
  };

  const fetchBalances = async (sdkInstance = sdk) => {
    if (!sdkInstance || !isInitialized) return;

    try {
      setIsLoading(true);
      setError(null);

      const unifiedBalances = await sdkInstance.getUnifiedBalances();
      setBalances(unifiedBalances);
      console.log('Unified balances fetched:', unifiedBalances);

    } catch (error) {
      console.error('Failed to fetch balances:', error);
      setError(error instanceof Error ? error.message : 'Failed to fetch balances');
    } finally {
      setIsLoading(false);
    }
  };

  const refreshBalances = async () => {
    await fetchBalances();
  };

  // Reset state when wallet disconnects
  useEffect(() => {
    if (!isConnected) {
      setSdk(null);
      setIsInitialized(false);
      setBalances([]);
      setError(null);
    }
  }, [isConnected]);

  return (
    <NexusContext.Provider
      value={{
        sdk,
        isInitialized,
        balances,
        isLoading,
        error,
        refreshBalances
      }}
    >
      {children}
    </NexusContext.Provider>
  );
}

export function useNexus() {
  const context = useContext(NexusContext);
  if (context === undefined) {
    throw new Error('useNexus must be used within a NexusProvider');
  }
  return context;
}
Key Features Explained
Dynamic Import: We use dynamic imports to ensure the SDK only loads on the client side, preventing server-side rendering issues.
Automatic Initialization: The SDK initializes automatically when a wallet connects, providing a seamless user experience.
Error Handling: Comprehensive error handling with user-friendly error messages and proper cleanup.
Hook Architecture: The SDK uses hooks for allowances and intents. We'll explore these more in Parts 2 and 3.
Step 5: Create Wallet Connection Component
A clean, user-friendly wallet connection interface.
Create components/WalletConnection.tsx:
'use client';

import { ConnectKitButton } from 'connectkit';
import { useAccount } from 'wagmi';
import { Wallet, CheckCircle, AlertCircle } from 'lucide-react';

export function WalletConnection() {
  const { isConnected } = useAccount();

  return (
    <ConnectKitButton.Custom>
      {({ isConnected, show, truncatedAddress, ensName, chain }) => {
        return (
          <button
            onClick={show}
            className={`
              flex items-center space-x-2 px-4 py-2 rounded-lg font-medium transition-all duration-200
              ${isConnected
                ? 'bg-green-50 text-green-700 border border-green-200 hover:bg-green-100'
                : 'bg-blue-600 text-white hover:bg-blue-700 shadow-lg hover:shadow-xl'
              }
            `}
          >
            {isConnected ? (
              <CheckCircle className="w-4 h-4" />
            ) : (
              <Wallet className="w-4 h-4" />
            )}
            <span>
              {isConnected ? (ensName ?? truncatedAddress) : 'Connect Wallet'}
            </span>
            {chain && (
              <span className="text-xs bg-white/20 px-2 py-1 rounded">
                {chain.name}
              </span>
            )}
          </button>
        );
      }}
    </ConnectKitButton.Custom>
  );
}

// Alternative: Simple default ConnectKit button for minimal setup
export function SimpleWalletConnection() {
  return <ConnectKitButton />;
}
Design Choices
Visual Feedback: The button changes appearance based on connection status, providing immediate visual feedback.
Chain Display: Shows the currently connected chain for user awareness.
Responsive Design: Works well on both desktop and mobile devices.
Step 6: Create Unified Balance Display
This component showcases the power of the Nexus SDK by displaying unified balances across all chains.
Create components/UnifiedBalances.tsx:
'use client';

import { useNexus } from './NexusProvider';
import { RefreshCw, Coins, TrendingUp, AlertCircle, ArrowRight } from 'lucide-react';

export function UnifiedBalances() {
  const { balances, isLoading, sdk, isInitialized, error, refreshBalances } = useNexus();

  if (!isInitialized) {
    return (
      <div className="text-center py-8">
        <div className="inline-flex items-center space-x-2 text-slate-500">
          <Coins className="w-5 h-5" />
          <span>Connect your wallet to view unified balances</span>
        </div>
      </div>
    );
  }

  if (error) {
    return (
      <div className="text-center py-8">
        <div className="inline-flex items-center space-x-2 text-red-500 bg-red-50 px-4 py-2 rounded-lg">
          <AlertCircle className="w-5 h-5" />
          <span>Error: {error}</span>
        </div>
        <button
          onClick={refreshBalances}
          className="mt-4 text-blue-600 hover:text-blue-700 underline"
        >
          Try Again
        </button>
      </div>
    );
  }

  return (
    <div className="space-y-6">
      {/* Header */}
      <div className="flex justify-between items-center">
        <div>
          <h2 className="text-2xl font-bold text-slate-900">Unified Balances</h2>
          <p className="text-slate-600">Your assets across all connected chains</p>
        </div>
        <button
          onClick={refreshBalances}
          disabled={isLoading}
          className="flex items-center space-x-2 bg-slate-100 hover:bg-slate-200 disabled:opacity-50 text-slate-700 font-medium py-2 px-4 rounded-lg transition-colors"
        >
          <RefreshCw className={`w-4 h-4 ${isLoading ? 'animate-spin' : ''}`} />
          <span>{isLoading ? 'Loading...' : 'Refresh'}</span>
        </button>
      </div>

      {/* Balance Cards */}
      {balances.length === 0 ? (
        <div className="text-center py-12">
          <div className="inline-flex items-center space-x-2 text-slate-500">
            <TrendingUp className="w-5 h-5" />
            <span>No balances found across connected chains</span>
          </div>
          <p className="text-sm text-slate-400 mt-2">
            Make sure you have assets on supported networks
          </p>
        </div>
      ) : (
        <div className="grid gap-4 md:grid-cols-2 lg:grid-cols-3">
          {balances.map((balance, index) => (
            <div
              key={index}
              className="p-6 bg-white rounded-xl border border-slate-200 shadow-sm hover:shadow-md transition-shadow"
            >
              <div className="flex justify-between items-start mb-4">
                <div className="flex items-center gap-2">
                  {balance.icon && (
                    <img src={balance.icon} alt={balance.symbol} className="w-6 h-6 rounded-full" />
                  )}
                  <h3 className="font-semibold text-lg text-slate-900">
                    {balance.symbol}
                  </h3>
                </div>
                <div className="text-right">
                  <p className="text-xl font-mono font-bold text-slate-900">
                    {parseFloat(balance.balance).toFixed(4)}
                  </p>
                  {balance.balanceInFiat > 0 && (
                    <p className="text-sm text-slate-500">
                      ${balance.balanceInFiat.toFixed(2)}
                    </p>
                  )}
                </div>
              </div>
              {/* Per-chain breakdown */}
              {balance.breakdown && balance.breakdown.length > 0 && (
                <div className="mt-2 space-y-1">
                  {balance.breakdown.map((item: any, idx: number) => (
                    <div
                      key={idx}
                      className={`text-sm flex justify-between ${item.balance === '0' ? 'text-gray-400' : 'text-gray-600'}`}
                    >
                      <span className="flex items-center gap-1">
                        {item.chain.name}
                      </span>
                      <span className="font-mono">{item.balance}</span>
                    </div>
                  ))}
                </div>
              )}
            </div>
          ))}
        </div>
      )}

      {/* Summary Stats */}
      {balances.length > 0 && (
        <div className="bg-gradient-to-r from-blue-50 to-indigo-50 rounded-xl p-6 border border-blue-100">
          <h3 className="font-semibold text-slate-900 mb-3">Portfolio Summary</h3>
          <div className="grid grid-cols-2 md:grid-cols-4 gap-4">
            <div>
              <p className="text-sm text-slate-500">Total Assets</p>
              <p className="text-lg font-semibold text-slate-900">{balances.length}</p>
            </div>
            <div>
              <p className="text-sm text-slate-500">Chains</p>
              <p className="text-lg font-semibold text-slate-900">
                {new Set(balances.map(b => b.chainId)).size}
              </p>
            </div>
            <div>
              <p className="text-sm text-slate-500">Last Updated</p>
              <p className="text-sm text-slate-700">Just now</p>
            </div>
            <div>
              <p className="text-sm text-slate-500">Status</p>
              <p className="text-sm text-green-600 font-medium">Active</p>
            </div>
          </div>
        </div>
      )}
    </div>
  );
}
Component Features
Unified Display: Shows balances from all chains in a single, coherent interface, a core value of Nexus!
Real-time Updates: Refresh button allows users to get the latest balance information.
Error Handling: Gracefully handles and displays error states with recovery options.
Portfolio Summary: Provides useful insights about the user's multi-chain portfolio.
Step 7: Update Root Layout
Connect all the providers and components together.
Update app/layout.tsx:
import { Web3Provider } from '@/components/Web3Provider';
import { NexusProvider } from '@/components/NexusProvider';
import { Inter } from 'next/font/google';
import './globals.css';

const inter = Inter({ subsets: ['latin'] });

export const metadata = {
  title: 'Nexus SDK Tutorial - Part 1: Getting Started',
  description: 'Learn chain abstraction by building unified balance viewing with the Avail Nexus SDK',
};

export default function RootLayout({
  children,
}: {
  children: React.ReactNode;
}) {
  return (
    <html lang="en">
      <body className={inter.className}>
        <Web3Provider>
          <NexusProvider>
            {children}
          </NexusProvider>
        </Web3Provider>
      </body>
    </html>
  );
}
Step 8: Create Main App Page
Bring everything together in a cohesive user interface.
Update app/page.tsx:
'use client';

import { WalletConnection } from '@/components/WalletConnection';
import { UnifiedBalances } from '@/components/UnifiedBalances';
import { useAccount } from 'wagmi';
import { useNexus } from '@/components/NexusProvider';
import { Globe, Zap, Shield, ArrowRight } from 'lucide-react';

export default function Home() {
  const { isConnected } = useAccount();
  const { isInitialized, isLoading } = useNexus();

  return (
    <main className="min-h-screen bg-gradient-to-br from-slate-50 to-blue-50">
      <div className="container mx-auto px-4 py-8">

        {/* Header */}
        <div className="text-center mb-12">
          <div className="inline-flex items-center space-x-2 mb-4">
            <Globe className="w-8 h-8 text-blue-600" />
            <h1 className="text-4xl font-bold text-slate-900">
              Nexus SDK Tutorial
            </h1>
          </div>
          <div className="mb-4">
            <span className="bg-blue-100 text-blue-800 text-sm font-medium px-3 py-1 rounded-full">
              Part 1: Getting Started
            </span>
          </div>
          <p className="text-xl text-slate-600 max-w-2xl mx-auto">
            Experience unified Web3 interactions by viewing your balances across
            multiple blockchains in one place
          </p>
        </div>

        {/* Wallet Connection */}
        <div className="flex justify-center mb-8">
          <WalletConnection />
        </div>

        {/* Main Content */}
        {isConnected ? (
          <div className="max-w-4xl mx-auto">
            <UnifiedBalances />
          </div>
        ) : (
          <div className="text-center py-12">
            <div className="max-w-md mx-auto">
              <h2 className="text-2xl font-bold text-slate-900 mb-4">
                Ready to Experience Chain Abstraction?
              </h2>
              <p className="text-slate-600 mb-8">
                Connect your wallet to see how the Nexus SDK unifies your multi-chain portfolio
              </p>
              <div className="bg-white/60 backdrop-blur-sm rounded-xl p-8 border border-slate-200">
                <p className="text-sm text-slate-500">
                  This demo will show you how the Nexus SDK aggregates balances
                  across multiple chains in real-time
                </p>
              </div>
            </div>
          </div>
        )}

        {/* Loading State */}
        {isConnected && isLoading && !isInitialized && (
          <div className="fixed inset-0 bg-black/20 backdrop-blur-sm flex items-center justify-center z-50">
            <div className="bg-white rounded-xl p-6 shadow-xl">
              <div className="flex items-center space-x-3">
                <div className="animate-spin rounded-full h-6 w-6 border-b-2 border-blue-600"></div>
                <span className="text-slate-700">Initializing Nexus SDK...</span>
              </div>
            </div>
          </div>
        )}
      </div>
    </main>
  );
}
Step 9: Environment Configuration
Set up your environment variables for proper wallet connectivity.
Create .env.local:
# WalletConnect Project ID (required for mobile wallet support)
# Get this free from https://cloud.walletconnect.com
NEXT_PUBLIC_WALLETCONNECT_PROJECT_ID=your_walletconnect_project_id

# Optional: App metadata
NEXT_PUBLIC_APP_NAME="Nexus SDK Tutorial - Part 1"
NEXT_PUBLIC_APP_DESCRIPTION="Learning chain abstraction with unified balance viewing"
Getting Your WalletConnect Project ID
- Visit WalletConnect Cloud
- Sign up for a free account
- Create a new project
- Copy your Project ID
- Paste it in your
.env.localfile
Note: This is required for mobile wallet connections but the app will work with browser wallets like MetaMask even without it.
Step 10: Testing Your Integration
Now let's test everything to make sure it works perfectly.
1. Start the Development Server
npm run dev
2. Testing Checklist
Visit http://localhost:3000 and verify:
✅ Basic Functionality:
- [ ] App loads without errors
- [ ] Part 1 badge displays correctly
- [ ] Wallet connection button appears
- [ ] Can connect MetaMask successfully
- [ ] Connection status updates correctly
✅ Nexus SDK Integration:
- [ ] SDK initializes after wallet connection
- [ ] Loading states display properly
- [ ] Unified balances appear (if you have assets)
- [ ] Refresh functionality works
✅ Error Handling:
- [ ] Graceful handling when no balances found
- [ ] Error messages display clearly
- [ ] Recovery options work (try again button)
✅ User Experience:
- [ ] Responsive design on mobile
- [ ] Smooth transitions and animations
- [ ] Clear visual feedback for all actions
Step 11: Understanding What You Built
Congratulations! You've just built something awesome. Let's understand what makes this demo special:
The Magic of Unified Balances
Before users had to:
- Switch networks manually in their wallet
- Check each chain separately for their assets
- Remember which assets are on which chains
- Manage multiple gas tokens for different networks
With your Nexus SDK integration, users can now:
- Connect once and see everything
- View all assets unified in one interface
- Get real-time updates across all chains
- Experience seamless multi-chain interactions
Technical Achievements
Smart SDK Management: Your app automatically initializes the SDK when a wallet connects and cleans up when it disconnects.
Error Recovery: Comprehensive error handling ensures users always have a path forward when something goes wrong.
Performance Optimized: Loading states and proper state management create a smooth user experience.
Future-Ready: The foundation you've built will support the advanced features in Parts 2-4.
Troubleshooting
Common Issues and Quick Fixes
🔧 SDK Won't Initialize
- Ensure MetaMask is unlocked and connected
- Check browser console for specific error messages
- Try refreshing the page after wallet connection
- Verify you're not running in server-side context
🔧 No Balances Showing
- Make sure you have assets on supported networks (Ethereum, Polygon, Arbitrum, Base, Optimism)
- Try the refresh button to fetch latest data
- Check that your wallet has permissions for the connected networks
🔧 WalletConnect Issues
- Verify your
WALLETCONNECT_PROJECT_IDin.env.local - The app works with MetaMask even without WalletConnect
- Clear browser cache if experiencing connection issues
🔧 TypeScript Errors
- Run
npm install @types/nodeif needed - Ensure all import paths use
@/prefix correctly - Check that all dependencies are compatible versions
🔧 Styling Issues
- Verify Tailwind CSS is properly configured
- Check that
globals.cssimports Tailwind directives - Ensure Lucide React icons are imported correctly
Part 1 Complete! 🎉
Amazing work! You've successfully built the foundation of an Avail Nexus application. Here's what you've accomplished:
✅ What You Built:
- Unified Balance View - See assets across all chains in one place
- Smart Wallet Integration - Seamless connection with visual feedback
- Real-time Updates - Fresh balance data with refresh capabilities
- Error Resilient - Graceful handling of network issues and edge cases
- Professional UI - Clean, responsive design with loading states
✅ What You Learned:
- How to set up the Nexus SDK from scratch
- Building unified Web3 experiences with Avail Nexus
- Proper error handling and user feedback patterns
- Creating production-ready wallet connection flows
Ready for Part 2?
In Part 2: Cross-Chain Operations, we'll unlock the real power of the Nexus SDK by adding:
Cross-Chain Transfers
- Move assets between chains with one click
- Real-time token transfer status tracking
- Automatic fee calculation and optimization
Smart Transaction Flows
- Intent-based transaction system
- Automatic route optimization
- Built-in slippage protection
Enhanced User Experience
- Transaction preview modals
- Progress tracking across multiple chains
- Advanced error recovery patterns
Get Ready for Part 2:
- Keep your Part 1 project - we'll build on top of it
- Make sure you have some testnet tokens on different chains
- Get testnet ETH from faucets for testing
Community & Resources
Share Your Progress
Built Part 1? We'd love to see it!
- Discord - Join our developer community
- Twitter - Share your progress with Avail Nexus
- GitHub - Explore Avail
Keep Learning
Next up: Part 2 where we'll add the game-changing cross-chain bridging capabilities that make the Nexus SDK truly revolutionary!